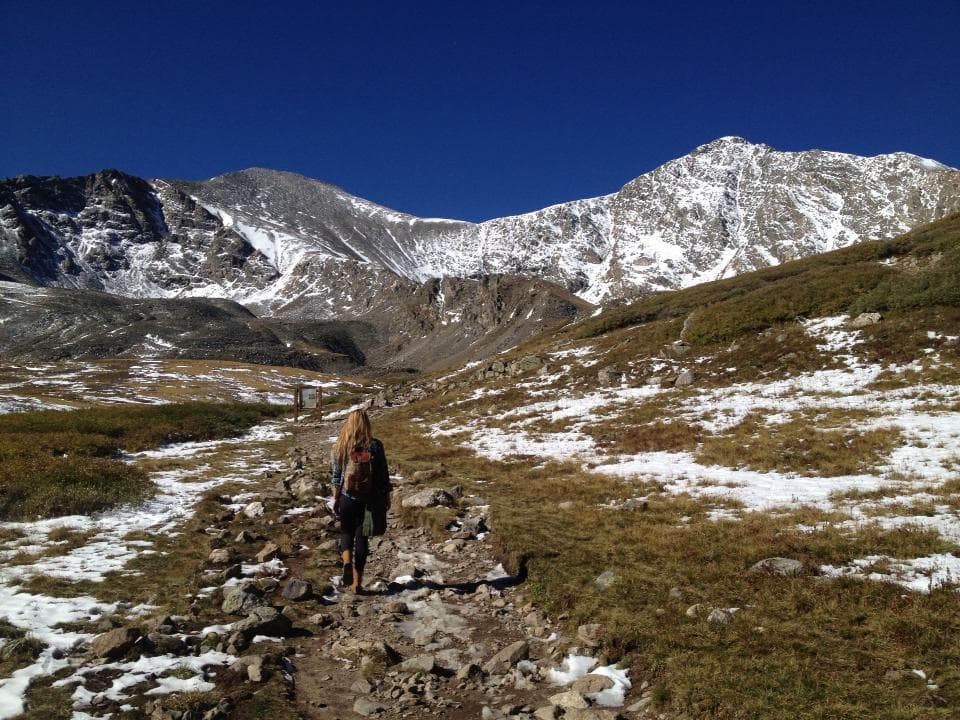
Hiking up to the tops of Colorado's highest peaks -- our 53 mountains that rise above 14,000 feet in elevation -- is a right of passage for outdoorsy types and an integral item for many people's Colorado-living checklist.
And while a relatively easy (emphasis on "relatively") mountain like Bierstadt can be summited by tourists and families, none of these hikes are a joke. So, as we're headed into 14er-climbing season -- conditions up there are good June through August -- let's figure out how to plan a couple trips.
We talked to Jeff Golden, experienced hiker and Colorado Mountain Club marketing manager, about preparing to climb a 14er -- especially if it's your first. Here's what you need to know, including suggestions for a few starter climbs.
What to pack:
For any kind of wilderness adventure, these are the 10 essentials:
- Map. You can go to websites like caltopo.com and print out a topographical map for free, or go to a store and get a $10-12 map. “A map is essential and also super fun,” Golden said, because in addition to keeping you from getting lost, you can use it to identify the peaks around you. 14ers.com is also a great resource. If you refuse to carry a map, you should at least take screenshots of their maps and route descriptions.
- Compass. Crucial for navigation. Your phone or GPS can do the trick, but you're safer with a simple magnetic compass.
- Sunglasses and sunscreen. "We’re already, in Denver, a mile closer to the sun. You get up to 14,000 and you’re another 2 miles closer,” Golden points out. It doesn't seem like much on the cosmic scale, but it makes a big difference. You should apply more sunscreen every two hours. And be especially good about wearing about sunglasses in the snow. Snow blindness, he says, “feels like someone’s scratching your eyeballs with sandpaper for three days.”
- Extra clothing. The weather changes a lot, and everyone's body reacts differently to the temperature and the exertion. "There's a lot of different ways to do it and there’s no right way," Golden said. "You definitely want to carry a raincoat because it rains pretty often.” (More on this below.)
- Headlamp/flashlight. You may not plan to be out in the dark, but you never know.
- First-aid kit. This doesn't have to be big -- just a credit-card sized kit with very basic stuff. If you encounter an injured person, use their kit first. The idea is to preserve your medical supplies as much as possible and to be prepared to survive on your own. (If someone needs your help, you should of course do what's necessary.) “There’s a lot of stuff that can happen out there, and you’re miles and miles from anything," Golden said.
- Firestarter. In case you need to build a fire.
- Matches. Same as above.
- Knife. For sharpness.
- Extra food and water. You'll need 2 to 3 liters of water, depending on the hike. An easier climb like Grays Peak is about a 2-liter trip. Something harder like Mt. Massive is a 3-liter trip. (Remember that everyone is different, though -- pack more if you need more.) And you'll be burning a huge amount of calories, so don't skimp on food. (More on that below.)
What to wear:
As you hike more and more, you'll learn what you need and can probably cut down on what you pack, but for the first trips, always over-pack. And pack smart.
"I’ll wear a synthetic T-shirt and I’ll carry a lightweight fleece and a lightweight down jacket and a rain coat," Golden said. "We always say, too, to avoid cotton, and that includes jeans ... Probably you’ll be fine, but the problem with cotton is once it’s wet, it doesn’t dry very quickly, and the weather up there changes very quickly."
One of the most common causes of hypothermia is wet clothes and cold air. He recommends nylon pants, too, and shoes that will also dry fast.
"For shoes, it’s personal preference," he said. "I started off wearing ankle-high hiking boots with Gore-Tex. As I got more experienced, I prefer the lightweight trail runners."
And if you're hiking in June or July, he strongly suggests traction devices ( note: be careful googling this), which are essentially little lightweight crampons for your feet. They'll be helpful when you need to cross a snowfield or patch of ice.
What to eat:
"Bring food that tastes good," Golden said.
"People are kind of obsessed with these bars and foods that are super healthy, that are marketed as energy bars. But a lot of times you’ll get up to 14,000 feet and an energy bar will taste like chalk and you don’t want to eat it. You’re hiking a 14er. It doesn’t really matter what you eat. Bring stuff you’re really going to want to eat.
"I always try to keep something in my pocket, whether its string cheese or a candy bar," he added. "A lot of people won’t eat enough because they only stop every couple hours."
And that's a good way to get sick. Keep something in your pocket to nibble on when you stop for a minute.
Start early:
"The general rule of thumb is to be heading down from the summit at noon," Golden said.
You'll need to start early, around 5 or 6 a.m., in most cases. There are a lot of injuries and deaths because people get caught above tree line during a storm.
Know the weather:
You should check the weather before you go, and even if the forecast looks clear, always be on the lookout for trouble. Monsoon season is also the height of summer hiking season, and during that time of year, you can practically set your watch to the weather. thunderstorms usually roll in around 2 or 3 p.m.
"What you want to be looking out for are puffy clouds that are building upward with dark under-bellies," Golden said. "If you see some of those and they’re off to the west and moving toward you, you might want to consider turning back and trying another day."
"Oftentimes, it’s pretty scattered and it moves pretty quickly," he added, "but that makes it pretty scary."

Expect snow:
It's common for snow to stick around the mountains, even across trails, into July. Even in August, you should plan for a little bit of snow (which means packing those essentials mentioned above).
Longs Peak is close, but it is not easy
"Longs is one of the more dangerous ones because it's accessible, it’s the only 14er in the [Rocky Mountain] National Park and it’s this iconic mountain you can see from the Front Range, but it’s a pretty technical climb," Golden said. "There’s some Class 3 scrambling, some exposure, it’s very long. A lot of people will start at 2 or 3 in the morning because it’s so long … It’s possible to get lost. There’s some areas there where you get off trail, you could be in a pretty dangerous position."
Here are some great beginner options:
Mt. Bierstadt is probably the most well-known option. It's a little more than an hour drive from downtown Denver, and a 7-mile hike with a 2,850-foot elevation gain. It's practically a parade up the trail on weekends.
Grays and Torreys are about 2.5 hours away from downtown Denver. The two peaks are connected by a saddle, so you can hit two for just about the price of one.
If you're willing to travel more, there's Huron Peak, about a three-hour drive away, past Leadville on the way to Buena Vista. Golden said it's a gorgeous hike with views of dramatic-looking 13ers called the Three Apostles once you're above tree line and a fantastic view from the summit.
There's also Handies Peak, if you're up for a weekend trip. It's in the southwest part of Colorado, in the San Juan range. Golden said it might be the easiest 14er of them all -- a 5-mile hike about 2,300 feet up, but only if you have four-wheel drive to access the trailhead.
Etiquette:
It's become a huge issue on Colorado trails in recent years, but being good to the trails and others on them is pretty easy.
"Very few people go into the mountains with an attitude of, 'Screw nature, I’m gonna throw down my trash and destroy this alpine tundra,'" Golden said. "A lot of times, I think, it’s just ignorance. People don’t know any better."
So here's the deal: Leave no trace. That means don't feed the wildlife, bring back everything you bring up -- food wrappers, water bottles, signs to hold at the summit, etc. -- and don't damage the environment by leaving the trail.
When you encounter other hikers, the uphill hiker has the right of way. A lot of times, though, the uphill hikers are the one who would prefer to stop. Just communicate.
Also, especially early in the season when snow is still melting, you'll probably encounter mud. Golden says it's important to hike through it:
"Don’t walk around the side of the trail to avoid getting wet or dirty. You’re outside. You’re hiking a 14er. Mud is a badge of honor."
Consider taking a class:
You can find wilderness preparedness and mountaineering classes all over town, often at outdoors shops like REI. The Colorado Mountain Club, for one, offers a wilderness trekking school right now, and a basic mountaineering school that offers basic 14er hiking skills, plus introductory rock climbing and snow climbing skills.
Have fun:
It's not going to be easy -- but if you're prepared and take it at a comfortable pace, you'll almost definitely be fine. Just enjoy what you went there to see.